You might have heard the enigmatic acronym “HDR” in reference to photography. It stands for “High Dynamic Range” and it creates photos with gorgeous, impossible detail and clarity. Keep reading to learn more, and see how you can use it.
Today we’ll learn about the different types of HDR imaging, demystify some confusing terminology, and look at the the various reasons that why HDR even exists in the first place. If you’re ready to expand your knowledge of photography, dive right in.
Cameras are limited to the amount of image detail they can record when the sensor is exposed to light. Whether you’re using the auto settings or are taking pics using skillfully tuned manual settings, your goal is trying to take advantage of the available light to maximize the detail in the result image. The problem is, when you’re shooting heavy shadows and bright lights, you are forced into losing detail in one range or the other.
A skilled photographer can tune her elements of exposure to achieve great detail in shadows or highlights, or choose the middle of the road, “proper” exposure solution, and lose some detail in both. Lots of detail in the shadows can give you thin, washed out highlights, while good detail in those same highlight areas will result in all shadows immediately jumping to a solid, dark black. Ordinarily, you’d want the “goldilocks” exposure that is somewhere in the middle.
Using this sort of “normal” exposure, where a photographer has to make these sorts of tough decisions, is sometimes called “Standard” or “Low” Dynamic Range imaging. This is what ordinary cameras shoot, including what nearly 100% of How-To Geek readers are likely to be using.
In order to avoid any confusion, it’s worth noting that there are many different methods of creating images that are all referred to as HDR, or High Dynamic Range Imaging. Many of these methods are very different, so it can be helpful to briefly look at our terminology, and explain away these confusing terms that all seem to overlap each other. Keep the following in mind when thinking of HDR:

Stepping around the problems of typical standard range photography, we can think of HDR Imaging as techniques that combine the image information from multiple exposures into one image with detail beyond the limitations of single exposures. Resourceful photographers know to use image bracketing when photographing a scene, or stopping up or stopping down the exposure in order to increase the chances of finding that proper “goldilocks” exposure. Even though your light meter or auto setting might say that the proper exposure has been selected, taking the same composition multiple times with multiple aperture or shutter speed settings will greatly boost your chances of getting that “best” image out of your shot.
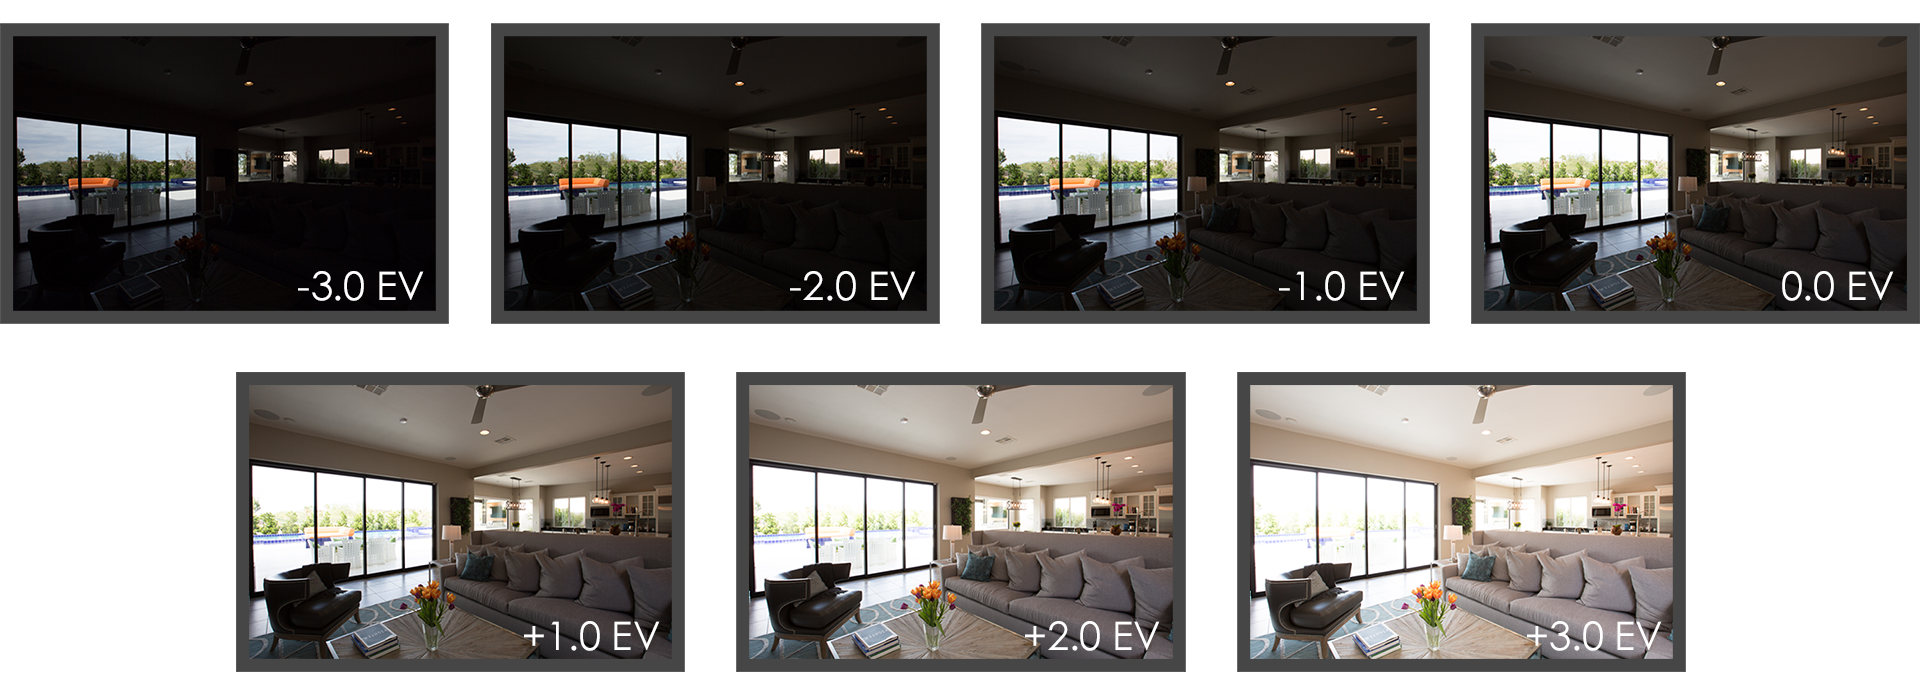
HDR Imaging also uses bracketing, but in a different way. Instead of shooting multiple exposures to create the best image, HDR wants to capture the maximum possible detail throughout the whole range of light. Photographers normally faced with the choice of losing detail in highlights and shadows can choose to bracket multiple exposures, shooting first for detail in the shadows, then for detail in the highlights, and a “goldilocks” exposure somewhere in the middle. By bracketing this way, professionals create the building blocks for their perfect image.
Credit for post: http://www.howtogeek.com/?post_type=post&p=64320